Platform · Object Builder: shape every Rose Rocket object without code
Field types: the 17 choices in Rose Rocket Object Builder
Every type on the Object Builder Field type list, what each holds, and the traps: a type never changes after Create, and every role gets the new field.
On this page3 sections
What it does
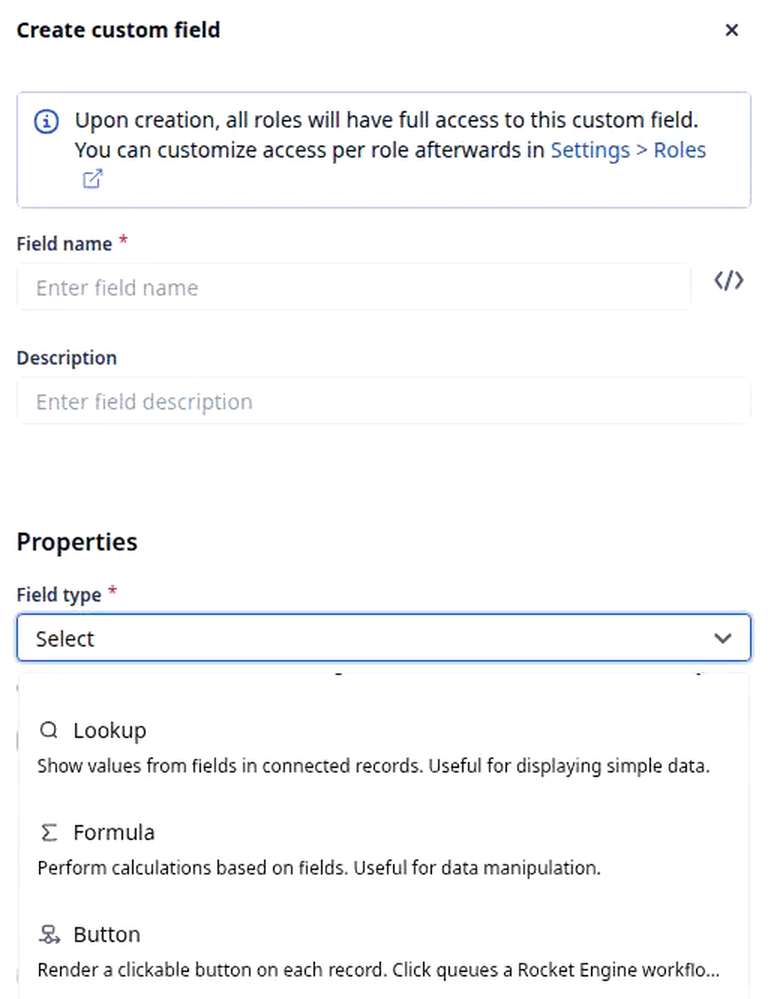
Once you know how a field’s type decides what it holds, this page is the list you pick from. The Field type list sits on the Create custom field form in Object Builder and offers seventeen types. The type is chosen once, before you click Create, and it settles which settings the form asks for next.
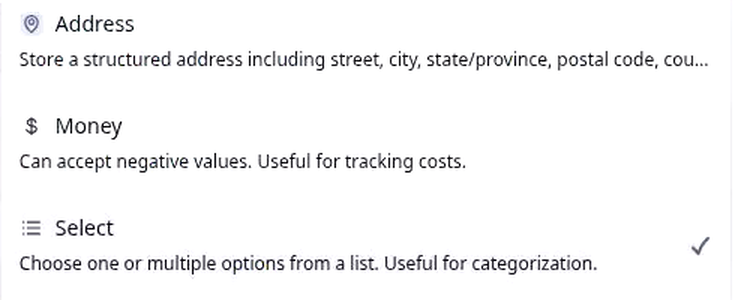
The list shows three rows at a time with a one-line description under each, so most of it is below the fold. In the list’s order:
| Type | What it holds | Example |
|---|---|---|
| Text | Free text: descriptions, notes, summaries | Delivery instructions |
| URL | A web address that opens in a new tab | Carrier tracking page |
| Toggle | Yes or No | Hazmat |
| Number | A number, with decimal places and a minimum or maximum if you set them | Number of stops |
| Measurement | A number with a unit, from the unit category you pick | Trailer length in ft |
| Address | A street, city, state or province, postal code and the rest of the address | Consignee address |
| Money | An amount, negative values allowed | Detention charge |
| Select | One option from your list, or several with Allow multi-select | Required Equipment: Flatbed |
| Status | One of your status labels, each with its colour | Claim status: Filed |
| Full ID | An automatic ID: a prefix of up to 12 characters and a sequence number | Claim ID: CLM-104 |
| Date | A date | Appointment date |
| DateTime | A date and time in a time zone, or a range | Pickup window |
| Time | A time of day | Dock opens |
| Connection | One or many records of another object | Trailer |
| Lookup | A value read from a connected record, through a connection you choose | Customer billing email |
| Formula | A calculation over other fields; see what a formula field is | Margin |
| Button | A button on each record that queues a Rocket Engine workflow when clicked | Send rate confirmation |
How you set it up
- Click Settings in the left nav, then Objects under Builders, then the object the field belongs to, for example Order.
- Click Create custom field. The form opens on the right with a note that every role will have full access to the new field.
- Type the Field name. The key behind the code icon beside it fills in as you type, built from the name and the type. Check it now; this is the moment it is set.
- Open Field type and scroll to the one that fits. The form changes shape: a Select asks for its options, a Formula shows Set formula, a Button asks for the workflow it runs.
- Leave Duplication behavior on Use default unless a copied record should not carry the value. A Formula or a Lookup has no choice here; their value is worked out, not copied.
- Click Create, drag the field into a section of the Internal data panel and click Save changes. If some roles should not see or change it, narrow that in Settings › Roles straight away.
Customizing the Order object runs these steps for three typed fields on a real order.
What to watch for
- The type cannot be changed after Create. The key is built from the name and the type, so a field of another type is a different field with a different key. Changing Number of stops from Text to Number means creating a new Number field and deleting the old one, and the values typed into the old field stay behind under its key. Nothing copies them across. Pick the type before the first order is saved.
- Deleting checks workflows, not everything. Before a field is deleted, Object Builder lists the workflows that read it, and you update those first. Formulas and board filters that use the field are not in that list, so look for them yourself before you retire a field.
- Renaming changes the label, not the key. The key is set from the name at creation. Rename Hazmat to Hazardous Materials later and people see the new label, while workflows, imports and anything that addresses the field by key still use the old one. When the key matters, settle the name before you click Create.
- A new field starts open to every role. The form says so: upon creation, all roles have full access to the custom field. A Carrier Cost field made on Monday is readable by every role that opens an order until someone narrows it in roles. For which fields each role sees on the record page, see detail view permissions.
- A Button is not data. It cannot be used in a formula or a lookup, and a board cannot filter or sort on it. If you need to know that someone clicked it, have the workflow it runs set a Toggle or a Date.